Wednesday, August 26, 2009

(Tips) Copying data using Client Access Data Transfer Function

The Client Access Data Transfer applications have the advantage of an easy-to-follow graphical interface, and automatic numeric and character data conversion. However, Data Transfer requires the installation of the Client Access product and requires use of both PC and iSeries server resources and communications between the two.

If you have Client Access installed on the PC and your server, you can use the Data Transfer applications to transfer data between stream files and database files. You can also transfer data into a new database file based on an existing database file, into an externally-described database file, or into a new database file definition and file.

* Transfer data from a database file to a stream file.
* Transfer data from a stream file to a database file.
* Move data into a newly created database file definition and file.
* Create a format description file.

Transfer data from a database file to a stream file

To transfer a file from a database file to a stream file on your server:

1. Establish a connection to the server.
2. Map a network drive to the appropriate path in the iSeries file system.
3. Select the Data Transfer from AS/400 icon from the Client Access Express window.
4. Select the server you want to transfer from.
5. Select the file names, using the iSeries database library and file name to copy from, and the network drive for the location of the resulting stream file. You can also choose PC File Details to select the PC file format for the stream file. Data Transfer supports common PC file types, such as ASCII text, BIFF3, CSV, DIF, Tab-delimited Text, or WK4.
6. Click the Transfer data from AS/400 button to run the file transfer.

You can also perform this data movement in a batch job with the Data Transfer applications. Proceed as above, but select the File menu option to save the transfer request. The Data Transfer To AS/400 application creates a .DTT or a .TFR file. The Data Transfer from AS/400 application creates a .DTF or a .TTO file. In the Client Access directory, two programs can be run in batch from a command line:

* RTOPCB takes either a .DTF or a .TTO file as a parameter
* RFROMPCB takes either a .DTT or a .TFR file as a parameter

You can set either of these commands to run on a scheduled basis by using a scheduler application. For example, you can use the System Agent Tool (a part of the Microsoft Plus Pack) to specify the program to run (for instance, RTOPCB MYFILE.TTO) and the time at which you want to run the program.

Transfer data from a stream file to a database file

To transfer data from a stream file to a database file on your server:

1. Establish a connection to the server.
2. Map a network drive to the appropriate path in the iSeries file system.
3. Select the Data Transfer to AS/400 icon from the Client Access Express window.
4. Select the PC file name you want to transfer. For the PC file name, you can choose Browse for the network drive you assigned, and choose a stream file. You can also use a stream file located on the PC itself.
5. Select the server on which you want the externally described database file to be located.
6. Click the Transfer data to AS/400 button to run the file transfer.

Note: If you are moving data to an existing database file definition on the server, the Data Transfer To AS/400 application requires you to use an associated format description file (FDF). An FDF file describes the format of a stream file, and is created by the Data Transfer from AS/400 application when data is transferred from a database file to a stream file. To complete the transfer of data from a stream file to a database file, click the Transfer to AS/400 button. If an existing .FDF file is not available, you can quickly create an .FDF file.

You can also perform this data movement in a batch job with the Data Transfer applications. Proceed as above, but select the File menu option to save the transfer request. The Data Transfer To AS/400 application creates a .DTT or a .TFR file. The Data Transfer from AS/400 application creates a .DTF or a .TTO file. In the Client Access directory, two programs can be run in batch from a command line:

* RTOPCB takes either a .DTF or a .TTO file as a parameter
* RFROMPCB takes either a .DTT or a .TFR file as a parameter

You can set either of these commands to run on a scheduled basis by using a scheduler application. For example, you can use the System Agent Tool (a part of the Microsoft Plus Pack) to specify the program to run (for instance, RTOPCB MYFILE.TTO) and the time at which you want to run the program.

Move data into a newly created database file definition and file

To move data into a newly created database file definition and file:

1. Establish a connection to the server.
2. Map a network drive to the appropriate path in the iSeries file system.
3. Select the Data Transfer to AS/400 icon from the Client Access Express window.
4. Open the Tools menu of the Data Transfer to AS/400 application.
5. Select Create AS/400 database file.

A wizard will appear that allows you to create an new AS/400 database file from an existing PC file. You will be required to specify the name of the PC file from which the AS/400 file will be based, the name of the AS/400 file which to create, and several other necessary details. This tool parses a given stream file to determine the number, type, and size of the fields that are required in the resulting database file. The tool can then create the database file definition on your server.

Integrated File System Introduction

Create a format description file

If you are moving data to an existing database file definition on the server, the Data Transfer To AS/400 application requires you to use an associated format description file (FDF). An FDF file describes the format of a stream file, and is created by the Data Transfer from AS/400 application when data is transferred from a database file to a stream file. To create a .FDF file:

1. Create an externally described database file with a format that matches your source stream file (number of fields, types of data).
2. Create one temporary data record within the database file.
3. Use the Data Transfer from AS/400 function to create a stream file and its associated .FDF file from this database file.
4. Now, you can use the Data Transfer to AS/400, and specify this .FDF file with the source stream file you want to transfer.


Source : Iseries Information Center

Read More...

Monday, August 17, 2009

(Tips) AS/400 Built In Functions %EOF

%EOF returns ’1’ if the most recent read operation or write to a subfile ended in an
end of file or beginning of file condition; otherwise, it returns ’0’.
The operations that set %EOF are:
“READ (Read a Record)”
“READC (Read Next Changed Record)”
“READE (Read Equal Key)”
“READP (Read Prior Record)”
“READPE (Read Prior Equal)”
“WRITE (Create New Records)” subfile only).

The following operations, if successful, set %EOF(filename) off. If the operation is
not successful, %EOF(filename) is not changed. %EOF with no parameter is not
changed by these operations.
“CHAIN (Random Retrieval from a File)”
“OPEN (Open File for Processing)”
“SETGT (Set Greater Than)”
“SETLL (Set Lower Limit)”

When a full-procedural file is specified, this function returns ’1’ if the previous
operation in the list above, for the specified file, resulted in an end of file or
beginning of file condition. For primary and secondary files, %EOF is available
only if the file name is specified. It is set to ’1’ if the most recent input operation
during *GETIN processing resulted in an end of file or beginning of file condition.
Otherwise, it returns ’0’.

This function is allowed for input, update, and record-address files; and for display
files allowing WRITE to subfile records.

Read More...

Saturday, August 15, 2009

(Tips) AS/400 Built In Functions %Equal

%EQUAL (Return Exact Match Condition)
%EQUAL returns ’1’ if the most recent relevant operation found an exact match;
otherwise, it returns ’0’.

The operations that set %EQUAL are:
“SETLL (Set Lower Limit)”
“LOOKUP (Look Up a Table or Array Element)”

If %EQUAL is used without the optional file_name parameter, then it returns the
value set for the most recent relevant operation.

For the SETLL operation, this function returns ’1’ if a record is present whose key
or relative record number is equal to the search argument.

For the LOOKUP operation with the EQ indicator specified, this function returns
’1’ if an element is found that exactly matches the search argument.

If a file name is specified, this function applies to the most recent SETLL operation
for the specified file.

Examples:

Read More...

(Tips) AS/400 Built In Functions %Found

%FOUND (Return Found Condition)
%FOUND returns ’1’ if the most recent relevant file operation found a record, a
string operation found a match, or a search operation found an element.
Otherwise, this function returns ’0’.

The operations that set %FOUND are:
File operations:
– “CHAIN (Random Retrieval from a File)”
– “DELETE (Delete Record)”
– “SETGT (Set Greater Than)”
– “SETLL (Set Lower Limit)”

String operations:
– “CHECK (Check Characters)”
– “CHECKR (Check Reverse)”
– “SCAN (Scan String)”
Note: Built-in function %SCAN does not change the value of %FOUND.

Search operations:
– “LOOKUP (Look Up a Table or Array Element)”

If %FOUND is used without the optional file_name parameter, then it returns the
value set for the most recent relevant operation. When a file_name is specified,
then it applies to the most recent relevant operation on that file.

For file operations, %FOUND is opposite in function to the ″no record found NR″
indicator.

For string operations, %FOUND is the same in function as the ″found FD″
indicator.

For the LOOKUP operation, %FOUND returns ’1’ if the operation found an
element satisfying the search conditions.

Examples:


Read More...

Tuesday, July 28, 2009

(Q&A) What is the Difference if I do the RESET or not?

(From : Oyie)

The CONNECT RESET statement is used to connect to a local database, you can use this if your AS/400 is not yet connected to any SQL servers. By default AS/400 is connected locally, therefore you don't need to execute CONNECT RESET in your program.

Example:
Try using DISCONNECT CURRENT to disconnect to your database, then issue CONNECT RESET to re-establish database connection.

C/EXEC SQL
C+ DISCONNECT CURRENT
C/END-EXEC

C/EXEC SQL
C+ CONNECT RESET
C/END-EXEC


Read More...

Monday, July 27, 2009

(Q&A) Can I connect to another AS400 file with embedded SQL in RPGLE?

(From : Anonymous)

If you are going to connect to a local database you can use CONNECT RESET SQL statement, but if you want to connect to another database/machine, you can connect to the desired machine by replacing the RESET parameter with the name of the remote database.

Read More...

Monday, July 20, 2009

(AS/400 For Dummies) Source Physical Files

Within the course we will be dealing with 3 kinds of files that contain members. Source Physical Files, Physical Files and Logical Files. Let's discuss first their differences. Physical files are files that contain data, Source Physical Files contain program sources, Logical Files do not contain data or program sources, it is a file that provides a view of the data stored into the Physical file.

In this chapter we will learning on how to create source physical file and on how to create source physical file members.

We need to create the following source physical files:
1) QDDSSRC - SRC-PF for Physical Files and Logical Files
2) QDSPSRC - SRC-PF for Display Files
3) QPRTSRC - SRC-PF for Printer Files
4) QRPGSRC - SRC-PF for RPG Program
5) QCLSRC - SRC-PF for CL Program
6) QRPGLESRC - SRC-PF for RPG ILE Program
7) QCLLESRC - SRC-PF for CL ILE Program

1-5 will have lengths of 92 while 6 and 7 will have 112.

Let's create QDDSSRC. On the command line type CRTSRCPF then press F4 key. Your screen should be like this:


Under the FILE parameter type QDDSSRC, then for the LIBRARY type the name of the library that you have created, in my case it's MYLIBRARY. For the LENGTH it should be 92, then for the DESCRIPTION type "PF and LF Sources". Your screen should look like this:


Then press ENTER key. You have now crreated your first SRC-PF. You can do the same method for the remaining 6 SRC-PFs, for items 6 and 7 don't forget to change the lenght to 112.


You Might Also Want To Visit The Following Tutorial Posts:
AS/400 For Dummies
AS/400 Tutorial
SQL/400 Tutorial
Query/400 Tutorial

Read More...

Friday, July 17, 2009

(AS/400 For Dummies) Creating Your First Library

Now that you are somewhat familiar with the AS/400 environment, let us try to create your personal library.

In the command line just type CRTLIB then press F4 key. Your screen should look like this:


We just need to supply the following parameters: Library (LIB), Library Type (TYPE) and Text Description (TEXT).
a) LIB, input the desired library name.
b) TYPE, input *TEST, since this is just a test library.
c) TEXT, input the description of your library.

See sample inputted parameter values:


After you are done setting up the parameters just press ENTER key. You now have created your first library.

You can also create the library using this command (w/o prompt screen):
CRTLIB LIB(MYLIBRARY) TYPE(*TEST) TEXT('My First Library')

You can check if the library was successfully created by using WRKOBJ command.
WRKOBJ OBJ(MyLibrary)


You Might Also Want To Visit The Following Tutorial Posts:
AS/400 For Dummies
AS/400 Tutorial
SQL/400 Tutorial
Query/400 Tutorial

Read More...

Thursday, July 16, 2009

(AS/400 For Dummies) Programming Development Manager (PDM)

Now, let's start talking about PDM. PDM is a part of application development tools which helps us work with libraries, objects and members. With PDM we can do library, object and member manipulation using a menu type interface, this is very useful for AS/400 beginners.

Here are some of PDM functions:
1) Work with libraries.
2) Work with objects.
3) Work with members.
4) Work with user defined options.

We can start using PDM menu by typing STRPDM on the command line then press ENTER key. Your screen would look like this:


Options 1-3 can be done using the following shortcut commands.
1)WRKLIBPDM - for library manipulation.
2)WRKOBJPDM - for object manipulation.
3)WRKMBRPDM - for member manipulation.

For the 3 commands, we can notice that WRKxxxPDM is common. For "xxx" we can substitute LIB (for library), OBJ (for object) and MBR (for member).

To manipulate library/object/member you can use the top options list as your reference for desired action. Options list is located here (inside the red box):


For example, you want to copy DEMO library, you can type "3" on the option field located at the leftmost portion of the list of libraries, then press ENTER key, now you will be prompted to enter new library name, after inputting the new name you can now press ENTER again.


You Might Also Want To Visit The Following Tutorial Posts:
AS/400 For Dummies
AS/400 Tutorial
SQL/400 Tutorial
Query/400 Tutorial

Read More...

Tuesday, July 14, 2009

(AS/400 For Dummies) AS/400 Libraries

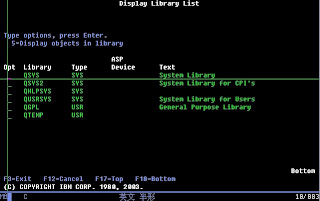
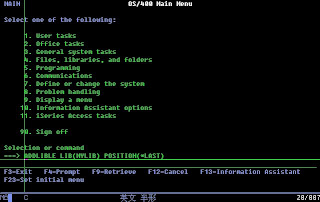
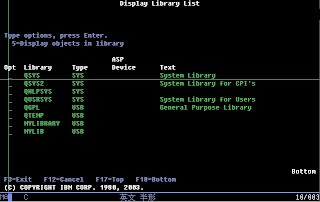
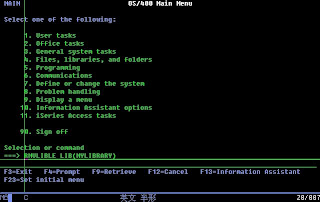
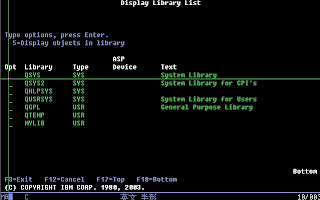
In AS400, libraries are very important to one's AS/400 job. Each AS/400 job has it own library lists. A library list is an ordered list of library names. It identifies the libraries that a user can use within a job and it also sequentially orders library priority.

By default, user only have the following system defined libraries to work on.

QSYS
QSYS2
QHLPSYSQUSRSYS
QGPL
QTEMP

We can use ADLIBLE or EDTLIBL to add user defined libraries.

Here's a list of commands that we can use to manipulate libraries.
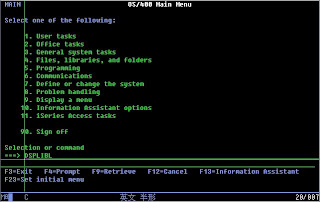
1) DSPLIBL - it displays current library list.


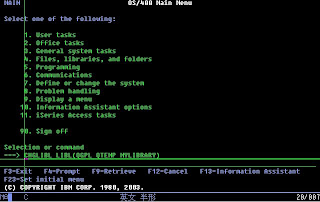
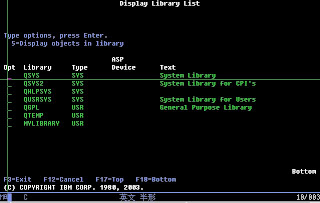
2) CHGLIBL - it is used to change user portion of the current job's library list.


3) ADDLIBLE - adds single library to user portion of the library list.


4) RMVLIBLE - removes single library from the user portion of the library list.


5) EDTLIBL - It displays current library list and it also allows the user to make changes in the user portion of the library list.


You Might Also Want To Visit The Following Tutorial Posts:
AS/400 For Dummies
AS/400 Tutorial
SQL/400 Tutorial
Query/400 Tutorial

Read More...

Monday, July 13, 2009

(AS/400 For Dummies) OS/400

OS/400

- AS/400's operating system. It is designed to cater multi-user and multi programming machine. It allows simultaneous program execution and program processing. The importance of understanding this will be helpful later in the course.


OS/400 Functions:

a) Programming
-Different programming utilities are available for developers. Such utilities are as follows: Source Entry Utility (SEU), Screen Design Aid (SDA), Report Layout Utility (RLU), Data File Utility (DFU), Query Utilities, Structured Query Language (SQL), etc. These utilities are very helpful in creating programs.

b) Data Management
-OS/400 offers data file maintenance. It allows both physical files and logical files data management.

d) Spooling Functions
-The OS also comes with printing queue functions, this is very important in a multi-user environment.

e) Work Management
-It allow administrators to manage job within the system. It's also very helpful in resources allocation and maintenance.

f) Security Functions
-OS/400 contains numerous access control features that makes AS/400 a very secured machine.


Common OS/400 Object Types:

1) Libray (*LIB)
-Libraries are logical spaces that holds objects. This is the place where you place your files, programs, out queues, job queues, etc. If you will compare it to PC it's like a directory. But unlike "directories", libraries can not contain another library whithin itself.

2) File (*FILE)
-Files are the ones holding the data, either permanent or temporary data. It can be one of the following; Physical File, Logical File, Display File, Printer File, Source Physical File, etc.

3) Program (*PGM)
-Executable programs. It is the object produced after compiling you program source.


OS/400 Commands:

OS/400 command is consist of command name and parameters. Command name is the instruction on what the user wants to do. Parameters are the details of the command operation.

Command names are in a simple VERB/NOUN construction, the the verb usually contains 3 character.
Examples:
1) DLT is for Delete Function
2) CHG is for Change Function
3) RNM is for Rename Function

Noun defines the object you want to access.
Examples:
1) F is for File
2) PF is for Physical File
3) OBJ is for Object.

Let's try to issue a command using the VERB and NOUNE combination.
a) To delete a file the command name should be: DLTF
b) To transfor object from one library to another the command name should be: MOVOBJ
c) To rename an obect the command name should be: RNMOBJ

To supply parameters, simply type the command name in the command line then press "F4" key, OS/400 will prompt user for required parameters.


You Might Also Want To Visit The Following Tutorial Posts:
AS/400 For Dummies
AS/400 Tutorial
SQL/400 Tutorial
Query/400 Tutorial

Read More...

(Q&A) Why do we hit a session device error?

(From : Anonymous)

There are three types of AS/400 session device error:

1. Permanent device or session error on I/O operation

A major return code of 81 indicates a serious error that affects the device or session.

These errors include hardware failures that affect the device, communications line, or communications controller. It also includes errors because of a device being disconnected or powered off unexpectedly, and abnormal conditions that are discovered by the device and reported back to the system. Both the minor return code and the accompanying message provide more specific information about the cause of the problem.

Depending on the file type, the program must either close the file and open it again, release the device and acquire it again, or acquire the session again. To reset an error condition in a shared file by closing it and opening it again, all programs sharing the open data path must close the file. In some cases, the message might instruct you to reset the device by varying it off and on again. It is unlikely that the program will be able to use the failing device until the problem causing the error is found and corrected, but recovery within the program might be possible if an alternate device is available.

Some of the minor return codes in this group are the same as those for the 82 major return code. Device failures or line failures might occur at any time, but an 81 major code occurs on an I/O operation. This means that your program had already established a link with the device or session. Therefore, the program can transfer some data, but when the program starts from the beginning when it starts again. A possible duplication of data might result.

Message numbers accompanying an 81 major code might be in the range that indicates either an I/O or a close operation. A device failure on a close operation might be the result of a failure in sending the final block of data, rather than action specific to closing the file. An error on a close operation can cause a file to not close completely. Your error recovery program should respond to close failures with a second close operation. The second close will always complete, regardless of errors.

2. Device or session error on open or acquire operation

A major return code of 82 indicates that a device error or a session error occurred during an open or acquire operation. Both the minor return code and the accompanying message will provide more specific information regarding the cause of the problem.

Some of the minor return codes in this group are the same as those for the 81 major return code. Device or line failures might occur at any time, but an 82 major code indicates that the device or session was unusable when your program first attempted to use it. Thus no data was transferred. The problem might be the result of a configuration or installation error.

Depending on the minor return code, it might be appropriate for your program to recover from the error and try the failing operation again after some waiting period. You should specify the number of times you try in your program. It might also be possible to use an alternate or backup device or session instead.

Message numbers accompanying an 82 major code might be in the range that indicates either an open or acquire operation. If the operation is an open operation, it is necessary to close the partially opened file and reopen it to recover from the error. If the operation is an acquire operation, it might be necessary to do a release operation before trying the acquire operation again. In either case, specify a wait time for the file that is long enough so that the system can recover from the error.

3. Recoverable device or session errors on I/O operation

A major return code of 83 indicates that an error occurred in sending data to a device or receiving data from the device. Recovery by the application program is possible. Both the minor return code and the accompanying message provide more specific information regarding the cause of the problem.

Most of the errors in this group are the result of sending commands or data that are not valid to the device, or sending valid data at the wrong time or to a device that is not able to handle it. The application program can recover by skipping the failing operation or data item and going on to the next one, or by substituting an appropriate default. There might be a logic error in the application.

The most common one is type 2, wherein you are trying to write an empty subfile. To find out the details of the encountered error, check the session's joblog by using DSPJOBLOG command then press ENTER, F10, PAGEUP, point your cursor to the error then hit F1.
Read More...

Friday, July 10, 2009

(FAQ) How To Convert Numeric To Character Format In AS/400 RPG-ILE.

We can convert numeric to character format in two ways; using BIF %CHAR and %EDITC.

1. %CHAR(expression{:format})

%CHAR converts the value of the expression from graphic, UCS-2, numeric, date,time or timestamp data to type character. The converted value remains unchanged,
but is returned in a format that is compatible with character data.

Sample:


a. To format the time and date with the default formats, use this:

result = ’It is ’ + %CHAR(time) + ’ on ’ + %CHAR(date)

b. To format the time and date with specific formats, use this:

result = ’It is ’ + %CHAR(time : *hms:) + ’ on ’ + %CHAR(date : *iso)

c. You can use %subst with the %char result if you only want part of the result:

result = ’The time is now ’ + %SUBST (%CHAR(time):1:5) + ’.’

d. Use %CHAR to convert a graphic value to character so it can be concatenated with a character value:

result = ’The customer’’s name is ’ + %CHAR(Name) + ’.’

e. Use %CHAR to convert a number to character format:

result = ’You have ’ + %char(points) + ’ points.’


2. %EDITC(numeric : editcode {: *ASTFILL | *CURSYM | currency-symbol})

This function returns a character result representing the numeric value edited
according to the edit code. In general, the rules for the numeric value and edit
code are identical to those for editing numeric values in output specifications. The
third parameter is optional, and if specified, must be one of:

a. *ASTFILL
Indicates that asterisk protection is to be used. This means that leading
zeros are replaced with asterisks in the returned value. For example,
%EDITC(-0012.5 : ’K’ : *ASTFILL) returns ’***12.5-’.

b. *CURSYM
Indicates that a floating currency symbol is to be used. The actual symbol
will be the one specified on the control specification in the CURSYM
keyword, or the default, ’$’. When *CURSYM is specified, the currency
symbol is placed in the the result just before the first significant digit. For
example, %EDITC(0012.5 : ’K’ : *CURSYM) returns ’ $12.5 ’.

c. currency-symbol
Indicates that floating currency is to be used with the provided currency
symbol. It must be a 1-byte character constant (literal, named constant or
expression that can be evaluated at compile time). For example,
%EDITC(0012.5 : ’K’ : ’X’) returns ’ X12.5 ’.

List of Edit Codes:


X – (obsolete; but it does retain leading zeros!)
Y – Slash insertion for date
Z – Zero suppresses leading zeros (no decimals, negatives)


Sample:


Read More...

Thursday, July 9, 2009

(Tips) Renaming Program Indicators AS/400 RPG

Naming your numeric indicators used in screen displays or printer files is an effective way to make your programs more readable and understandable, but did you know there are two ways it can be done? The first method is associating a data structure using the INDDS keyword, and the second method is by address association using the BASED keyword.

The first method uses the INDDS keyword which references a data structure. Within the data structure you give each indicator you use a unique name. So instead of saying IF *IN99 = *ON, you can say IF ERROR = *ON. This provides someone who has never been in the program before a better understanding of what the test is, instead of having to hunt down every occurrence of the indicator and figure it out from there.


The keyword INDDS references a data structure named Indicators. The data structure is a length of 99, but you don't need to specify every indicator, only the ones you're using. Additionally, the keyword INDARA needs to be present in the display or printer file you're referencing. The data structure can be referenced by more than one display and/or printer file within the program. You can also create separate ones for each. The second method uses the BASED keyword. It is similar to the first method except it does not require changes to the file specifications or either the display or printer files; all the changes are in the data structure, like so:


Here, the built-in function %ADDR references the Indicator array, and BASED references the data structure you provide. A difference between the two methods is that the first method can refer to a different data structure for each display and/or printer file you use, whereas the second one would apply to all. Here's an added tip, regardless of which method you use. You are not restricted to one name for each indicator. It is possible to supply multiple names for each. For example if indicator 50 is used to condition a field on two different screens, each with a different meaning, you can specify something like this within the data structure:


This way you're not stuck using a name in another part of the program that isn't the intended meaning. A word of caution however, as when you condition one of the named indicators above, it affects both when they're sharing the same indicator within a data structure. As long as this is kept in mind when designing the program, you'll be OK.
Read More...

Wednesday, July 8, 2009

(iSeries Blunders) Part III

December 14th, 2005 by ReiVi
Source : http://techblog.livingatrandom.com

There was this one time that I was at a client site doing some programming work. I noticed that one of the system operators was removing and then re-inserting a cartridge from the AS/400’s tape drive. He would walk back to the main console and type something. Shaking his head he would go through the entire process again.

After a few more minutes, I heard him mutter what sounded like a mixture of a curse and thank you.

I couldn’t take it anymore, so I asked him what happened.

Apparently, he was trying to initialize the tape in preparation for a backup. Whenever he typed the INZTAP command on the console, it would return an error that there was no tape in the drive. He removed and re-inserted the tape. He even tried using brand new tapes to no avail. Finally, he decided to signoff of the AS/400. Just before signing back-in, he noticed that he was connected to the remote AS/400 all that time.

He was very thankful that there was no tape on the remote (production environment) AS/400. If there’d been one — and it contained important data — he would have unknowingly erased it’s contents.

Lesson learned: If you work for a company that has multiple AS/400’s — whether local or remote — make sure that you are connected to the correct machine before doing anything.
Read More...

(iSeries Blunders) Part II

August 22nd, 2005 by ReiVi
Source : http://techblog.livingatrandom.com

Have you ever worked on two programs at the same time? You are coding this current requirement when a user comes up to you from behind and blurts out, “Can you fix this? We just need an additional column on the report. My boss needed it yesterday.” Sound familiar? Knowing that it won’t take you an hour to do the modification, you agree.

Now, the thing here is, you are using a dumb terminal. Since you don’t want to exit your current task and mess up all the library list settings and stuff, you decide to use the dumb terminal next to it. You open the code up in SEU and start coding.

All of a sudden, you remembered the user never gave you the change request form. Your boss gave everyone a briefing on the subject just the other day. Setting, the keyboard aside, you call the user and request for the necessary paperwork.

While waiting for the change request to arrive, you decide to go back to your original task. Reaching for the keyboard, you start to type. But nothing happens. You hit the reset key. Still nothing. In desperation you start hitting random keys with your fingers like you are touch typist gone mad! Nothing’s happening.

“Oh no! I haven’t even saved my work yet! That’s almost a half-day’s work!”, you murmur to yourself.

As you hang your head, you glance at the other terminal and notice that the screen is garbled. What used to be code is now a jumbled mess of letters and numbers!

“What happened?”, you ask yourself in horror.

Tracing the cable of the keyboard you are using, you realize that you were using the keyboard for the other terminal!

“This has got to be the worse day in my life. Now I messed up two program codes!”

With a prayer you press F5 to refresh the screen.

The jumbled screen refreshes and you see your code, you say a short prayer thanking the heavens for your good fortune. Just then the user arrives with the change request.
Read More...

(iSeries Blunders) Part I

August 20th, 2005 by ReiVi
Source : http://techblog.livingatrandom.com

Since this is my first article, I decided to look back at my career. Starting out in 1996 with a small IT company, I was a fresh graduate and like other graduates, I had no idea what an AS/400 (which is what they called the iSeries back then) was. Naturally, I was pretty excited. When I say this big refrigerator in the middle of the room, I said to myself, “Cool! I get to program using a mainframe!” The other trainees and I were told later that day however, that it was a midrange.

“Huh? A mid-what?”

Since our exposure in college was focused on PC’s and DOS (Yeah, yeah, yeah. It was that long ago), we only had a rough idea of what other platforms were. Heck, we thought mainframes belonged to musuems even then. The dumb terminals that were assigned to us were really big…about the size of a microwave oven.

Eventually, the other trainees and I went through…well…training. We were all coding happily one day when one of us suddenly had an endless loop in a piece of code. No problem! Just press Ctrl-C or Ctrl-Break. But how? There isn’t even a Ctrl key!

Since it was almost time to go home anyway, we all suggested to our colleague, “Just turn the terminal off and we’ll go home. You can find the bug tomorrow.”

Imagine our suprise when we were all called down to our boss’ office the following day. We found out the hard way that turning the terminal off doesn’t necessarily end the job. We all were given a long lecture on how to use the System-Request key.
Read More...

(Tips) Uses of OVERLAY Op-Code AS/400 RPG ILE

The OVERLAY keyword overlays the storage of one subfield with that of another
subfield, or with that of the data structure itself. This keyword is allowed only for
data structure subfields.

Usage:
OVERLAY(name{:pos | *NEXT})

The Name-entry subfield overlays the storage specified by the name parameter at
the position specified by the pos parameter. If pos is not specified, it defaults to 1.

Examples:
A. Storage Allocation of Subfields with Keywords DIM and OVERLAY


B. Storage Allocation of Subfields with Keywords DIM and OVERLAY


C. Defining Subfield Overlay Positions with *NEXT


Read More...

Tuesday, July 7, 2009

(Tips) Coding AS/400 RPG ILE Arrays

Here are samples on how to code arrays in RPG.
Definition Specifications for Different Types of Arrays:


Read More...

(Tips) Useful AS/400 RLU Commands

The following line commands are available in RLU, in addition to most SEU line commands:

DR - Define Record Format
CL - Change Line Type
SD - Create Sample Data
VF - View Field Line
NP - New Page
DC - Define Constants
DF - Define Fields
CF - Center Fields
SP - Space Fields Evenly

Read More...